In this article, you will learn how to trim your VM disks on Proxmox PVE in order to save valuable storage space and extend the capacity for longer.
Disk wastage is a common problem in virtualisation, the issue usually starts from creating a VM with too much allocated storage or a template that has large size disks. Either way, the problem soon grows and for a lot of companies this can become an expensive problem unless its managed correctly.
Discard support was added to instruct SSD disk drives what data can be cleaned (Trimmed) in order to increase performance and also extend the life of the SSD. The same practice can be used to instruct VMs to inform the main host, in our case Proxmox PVE, which data is no longer required. This allows the host to regain space.
For example, if you have a VM that has a 1TB hard disk, but its only using 500GB, rather than the 1TB used and 50% of it wasted until filled, the host will take back that unused space and show that it has more storage available for other VMs. The VM will still have 1TB available, but it will not take that space until required.
The flip side to this is that you would need to ensure all your VMs do not suddenly fill their hard disks up otherwise you would run into problems. Over provisioning is useful but needs to be monitored.
Whatever the mind of man can conceive and believe, it can achieve.
Napoleon Hill
Requirements To Trim VM Disks
- Proxmox PVE
- Permissions to manage the VMs within Proxmox
- Virtio Drivers
- Virtio SCSI disks
- Thin Provisioned Storage
- Root / Administrator acces to the VMs
As mentioned, we can only trim guests that are located on thin-provisioned storage such as, LVM-Thin, ZFS over ISCSi or Ceph. This will not work on thick provisioned storage.
For more information on Proxmox PVE you can visit their official website.
Before You Begin
Its important that your VMs are configured with Virtio SCSI disks for this to work, it will not work on anything else such as IDE or Virtio Block.
If you are using anything other than Virtio SCSI (Now known as SCSI) then you will need to install the Virto drivers, do not simply change the hard disks to SCSI without the drivers being installed as your VM will fail to boot.
The Virtio drivers can be found here
Step 1: Enable Trim Discard
First of all, we need to enable discard support on the VM hard disks, we need to do this on every hard disk the VM has assigned to it. You can do this on any VM OS that has the Virtio drivers installed, in our case Windows and Linux.
In Proxmox PVE, click on your VM, then head over to the hardware tab on the right. In this example we are doing this on a Debian VM called debiantraining.
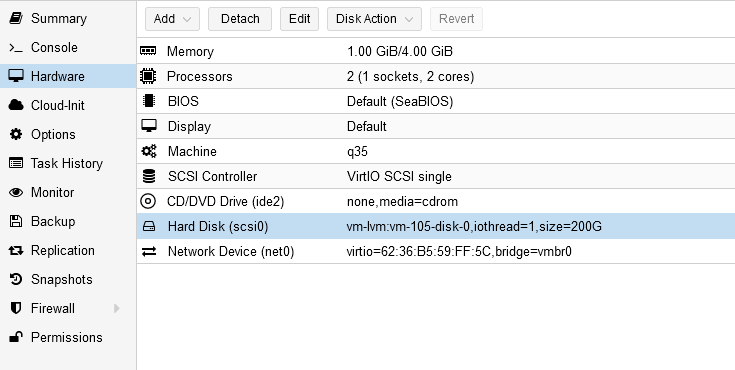
We will now select the hard disk (scsi0) we want to enable trim on by double clicking on the hard disk and ticking the Discard option;

Now click ok.
As you can see, we now need to shut the VM down and power back on for the changes to take affect.
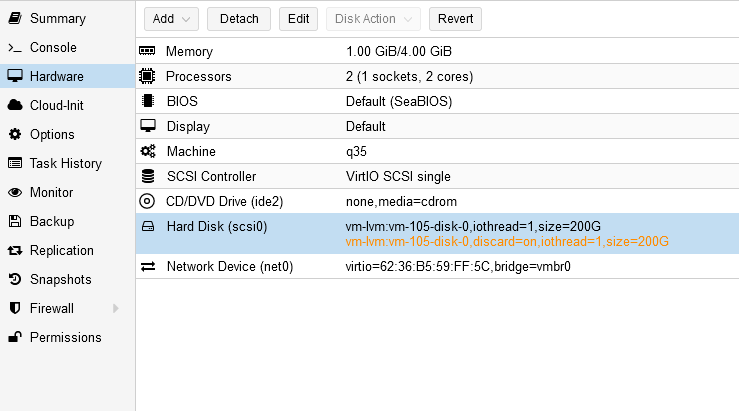
Once you have shut down and powered up the VM, Discard is now enabled.
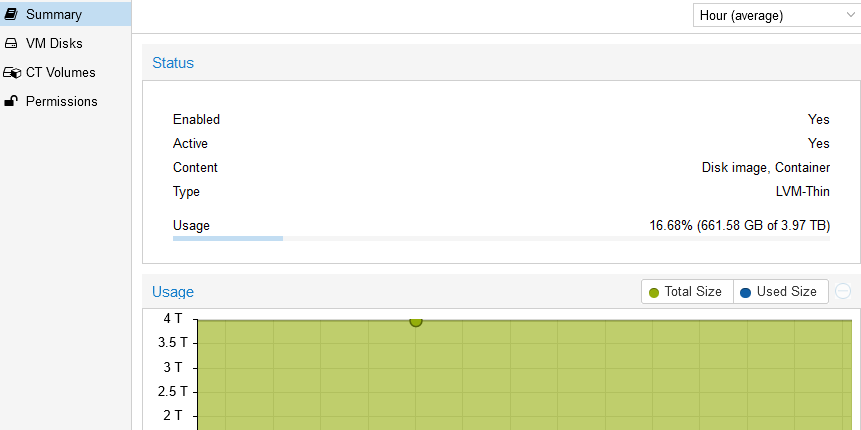
Before we move on, lets check what our current storage capacity is looking like. Our VMs are on the vm-lvm volume of the Proxmox server
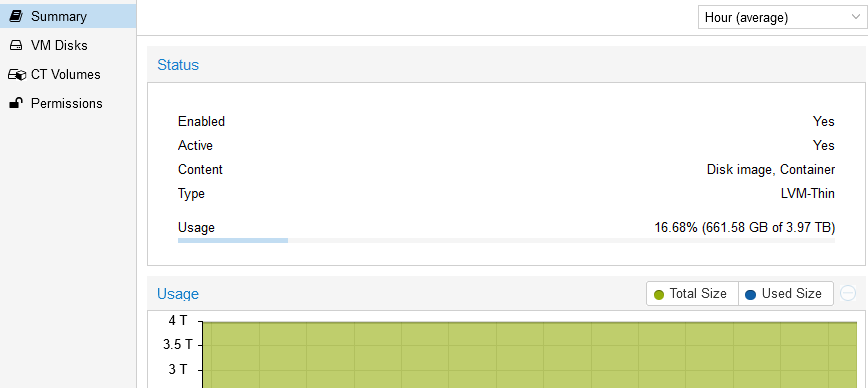
As you can see, we currently have 661.58GB in use out of 3.97TB.
Step 2: Create A Test File
We will now create a 20GB test file in the Debian VM.
Login as root and run the following command;
dd if=/dev/zero of=/tmp/20g.img bs=1 count=0 seek=20GConfirm the file exists by running the following command
ls -la /tmp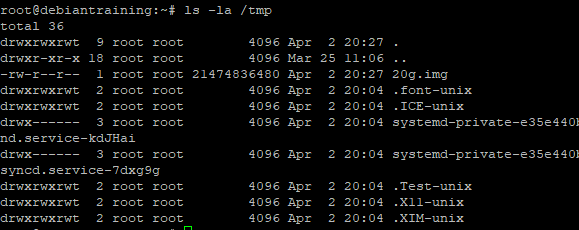
Our test image file is there and the size is 20GB.
Now lets look back at our storage, the vm-lvm volume should now show the additional 20GB.
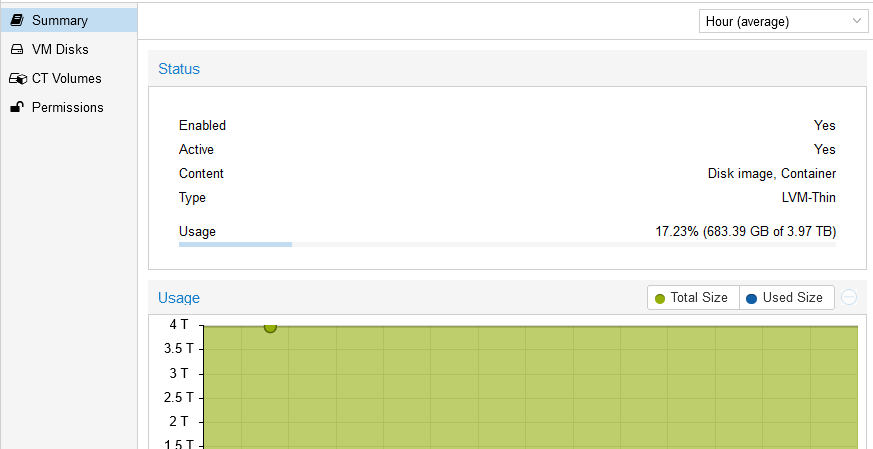
As you can see Proxmox has seen that we created a 20Gb file, and now shows 683.39GB in use.
Now lets delete the file in our VM by running the following command;
# rm /tmp/20g.imgNow lets check back at our storage
There is no change, essentially we have now wasted 20Gb which could of been used for something else. Although in this instance its not a problem, if you had low total capacity, this would be an issue.
Step 3: Trim The VM
In order to instantly regain our wasted space, we need to run some commands.
Most distributions of Linux come shipped with fstrim which is what we will use on our VM.
As root run the following command;
fstrim -aDepending on the amount of space the Proxmox host needs to regain will depend on the time to takes for the space to become available.
Now in our example we used 20GB and then remove the file, lets now look at the amount of space we have.
The Proxmox host has now taken back the space from the VM and is available for use.
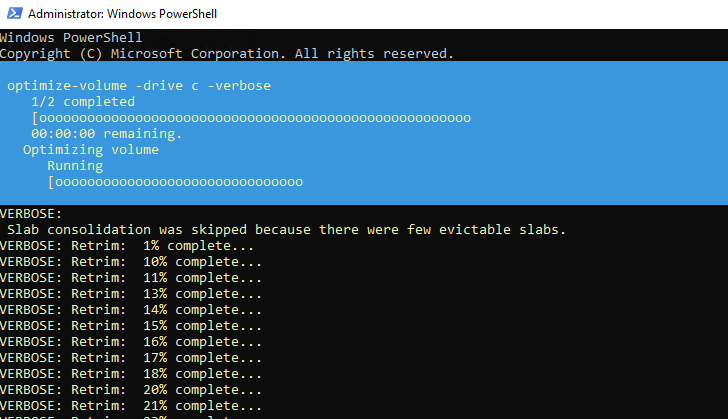
To trim a Windows VM, the proceedure we just went through is the same except instead of running fstrim we need to run the following powershelll command;
optimize-volume -drive c -verbose -retrimYou would subsitute ‘c’ for which ever drive letter you are trimming.
Step 4: Automate VM Trim
Thankfully, the manual method we just showed should only be needed if your VM doesnt have trim enabled by default.
Most distributions now have this enabled to run periodically.
To check on a Debian OS, run the following command;
systemctl status fstrim.timerThe output should be like the following.
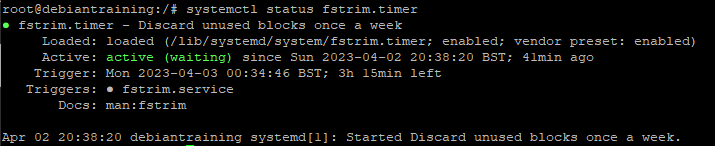
As you can see, the timer is set to run once a week so unless you urgently need to regain the space, you can let the OS take care of the trim automatically.
You can also check the fstrim service is running by running the following command;
# systemctl status fstrimThe output should be like the following.

The service is active but currently awaiting instructions.
If the trim timer is not enabled, you can run the following command to enable it;
systemctl enable fstrim.timeor if you want to disable it and manually trim your VMs, you can run the following command to disable it;
systemctl disable fstrim.timeWindows uses the maintenance task of optimizing the drives which is enabled by default and also includes the defragmentation process. This also runs on a weekly cycle.
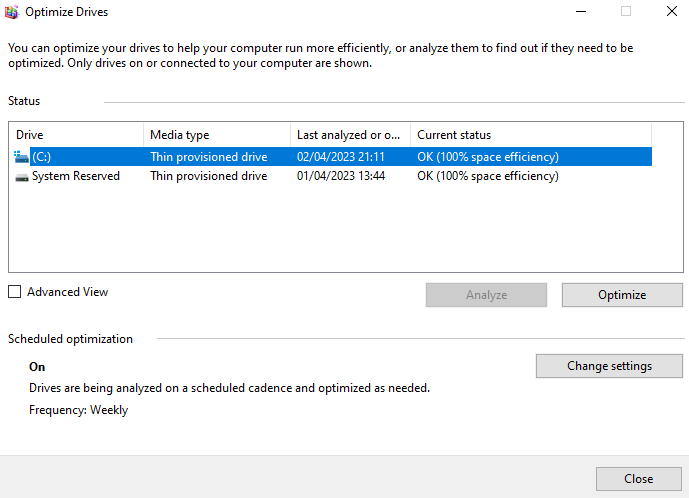
As you can see in this example, our Windows VM has 100% space efficiency, meaning the weekly task is releasing the unused space back to the Proxmox host.
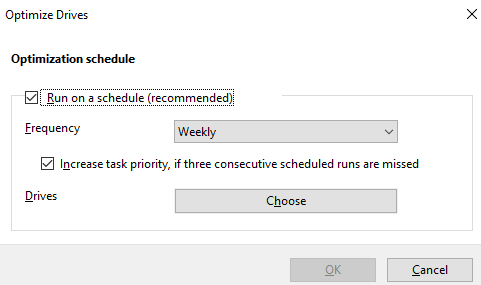
If you wish to disable or change this, you can simply click on change settings and switch off the schedule.
Now we have learned how to trim our VMs on Proxmox, we hope you found this useful. For more information feel free to contact us.