Keeping your OS up to date is essential in the fight against attackers. Maintaining updates can be a mundane task, especially where there are a lot of servers to manage. For Debian, updating can be made very simple with the use of automatic updates. By default automatic updates are not enabled unless you are using Gnome, so in this tutorial you will learn how to configure automatic updates on Debian.
The journey of a thousand miles begins with one step.
Lao Tzu
Requirements
- You will need root access to the Debian OS.
- Your OS should be supported (at least Debian 10)
We always advise keeping to the latest operating system, currently Debian 11. If you miss upgrade paths, i.e from Debian 9 to 11, then sometimes the upgrade process is a lot harder. For purpose of this tutorial we will be using Debian 11.
If you want to try out Debian then you can simply spin up a Virtual Private Server with us, the server will be available within minutes.
For Debian distribution information you can visit the Debian website
Before You Begin
Lets get apt up to date, if we do not do this then the package may not be available when we try to install it. Login to SSH using root and running the following:
apt update && apt upgradeStep 1: Install Automatic Updates
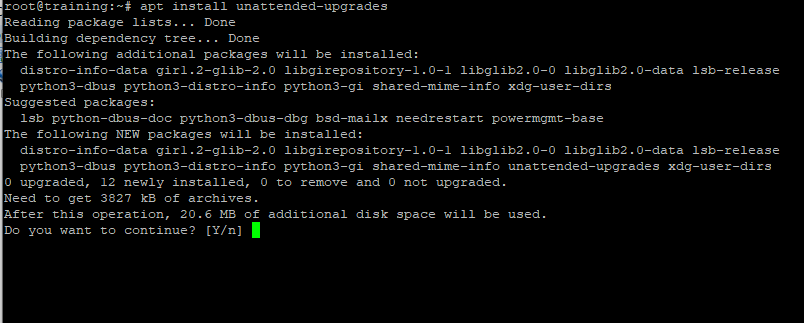
First of all, we need to download and install the unattended-upgrades package:
apt install unattended-upgradesDuring the install process, apt will prompt to continue, if you are happy please enter ‘Y‘
Once the install has completed, we can now start the unattended-upgrades service by running the following
systemctl enable unattended-upgrades
systemctl start unattended-upgrades
This will make sure the service is running, and will also ensure the service is running after a reboot.
Now lets look at the configuration file /etc/apt/apt.conf.d/50unattended-upgrades
vi /etc/apt/apt.conf.d/50unattended-upgrades The contents of the file should look like the following, with more available scrolling down within you editor. Anything with // in front of it means its commented out and wont be included in the configuration:
// Unattended-Upgrade::Origins-Pattern controls which packages are
// upgraded.
//
// Lines below have the format format is "keyword=value,...".  A
// package will be upgraded only if the values in its metadata match
// all the supplied keywords in a line.  (In other words, omitted
// keywords are wild cards.) The keywords originate from the Release
// file, but several aliases are accepted.  The accepted keywords are:
//   a,archive,suite (eg, "stable")
//   c,component     (eg, "main", "contrib", "non-free")
//   l,label         (eg, "Debian", "Debian-Security")
//   o,origin        (eg, "Debian", "Unofficial Multimedia Packages")
//   n,codename      (eg, "jessie", "jessie-updates")
//     site          (eg, "http.debian.net")
// The available values on the system are printed by the command
// "apt-cache policy", and can be debugged by running
// "unattended-upgrades -d" and looking at the log file.
//
// Within lines unattended-upgrades allows 2 macros whose values are
// derived from /etc/debian_version:
//   ${distro_id}            Installed origin.
//   ${distro_codename}      Installed codename (eg, "buster")
Unattended-Upgrade::Origins-Pattern {
        // Codename based matching:
        // This will follow the migration of a release through different
        // archives (e.g. from testing to stable and later oldstable).
        // Software will be the latest available for the named release,
        // but the Debian release itself will not be automatically upgraded.
//      "origin=Debian,codename=${distro_codename}-updates";
//      "origin=Debian,codename=${distro_codename}-proposed-updates";
        "origin=Debian,codename=${distro_codename},label=Debian";
        "origin=Debian,codename=${distro_codename},label=Debian-Security";

        // Archive or Suite based matching:
        // Note that this will silently match a different release after
        // migration to the specified archive (e.g. testing becomes the
        // new stable).
//      "o=Debian,a=stable";
//      "o=Debian,a=stable-updates";
//      "o=Debian,a=proposed-updates";
//      "o=Debian Backports,a=${distro_codename}-backports,l=Debian Backports";
};

...
Step 2: Removing Unused Dependencies
You can configure unattended-upgrades service to remove any unused dependencies by changing the settings in /etc/apt/apt.conf.d/50unattended-upgrades. We simply need to uncomment the lines removing // as follows:
// Remove unused automatically installed kernel-related packages
// (kernel images, kernel headers and kernel version locked tools).
Unattended-Upgrade::Remove-Unused-Kernel-Packages "true";

// Do automatic removal of newly unused dependencies after the upgrade
Unattended-Upgrade::Remove-New-Unused-Dependencies "true";

// Do automatic removal of unused packages after the upgrade
// (equivalent to apt-get autoremove)
Unattended-Upgrade::Remove-Unused-Dependencies "true";
Step 3: Blacklisting Packages
If you want to block updates for any packages, such as Apache2 then the Unattended-Upgrade::Package-Blacklist section of the configuration file allows you to block these from updating.
To block updates for specific pacakges, then add the pacakage names to the list. In this example we will use Exim4 and Apache2.
Unattended-Upgrade::Package-Blacklist {
    // The following matches all packages starting with linux-
//  "linux-";
    "apache2";
    "exim4";
    // Use $ to explicitely define the end of a package name. Without
    // the $, "libc6" would match all of them.
//  "libc6$";
//  "libc6-dev$";
//  "libc6-i686$";

    // Special characters need escaping
//  "libstdc\+\+6$";

    // The following matches packages like xen-system-amd64, xen-utils-4.1,
    // xenstore-utils and libxenstore3.0
//  "(lib)?xen(store)?";

    // For more information about Python regular expressions, see
    // https://docs.python.org/3/howto/regex.html
};

...
We do not advise blocking any package updates as this could cause potential dependency problems later on.
Step 4: Enabling Automatic Updates on Debian
To enable automatic updates you need to ensure that the apt configuration file contains to the correct setting. Lets open the config file
vi /etc/apt/apt.conf.d/20auto-upgrades
This file lets you define how often the automatic updates will run:
APT::Periodic::Update-Package-Lists "1";
APT::Periodic::Unattended-Upgrade "1";- Update-Package-Lists:
1enables auto-update,0disables. - Unattended-Upgrade:
1enables auto-upgrade,0disables.
Lets add another line to enable autocleanup of updates:
APT::Periodic::Update-Package-Lists "1";
APT::Periodic::Unattended-Upgrade "1";
APT::Periodic::AutocleanInterval "21";
- AutocleanInterval: Enables auto cleanup of packages. The above configuration is set for 21 days
Step 5: Testing Automatic Updates on Debian
You can carry out a dry run test on the configuration. The test run an update, but no changes are made to the system.
unattended-upgrades --dry-run --debugWith everything now set, we have learned how to configure automatic updates on Debian. Remember to do this on all your servers, it only takes one server that is insecure to allow attackers into your network.